이번 포스팅에서는 Locust를 활용하여 Django 프로젝트에 대해 부하 테스트를 하는 방법에 대해 소개해보려 합니다!
부하 테스트(Load Testing)란?
한 마디로, 부하 테스트란 아래 질문에 대한 테스트입니다.
시스템에 임계점의 부하가 계속될 때 문제가 없는가?
목적 : 시스템의 신뢰도와 성능을 측정
Locust란?
Locust는 오픈 소스 부하 테스트 도구로, 파이썬 언어로 테스트 시나리오를 간편하게 작성할 수 있습니다.
쉽게 말해, 내가 만든 서버에 수많은 사용자들이 동시에 들어올 때 어떤 일이 벌어지는지를 확인하는 도구입니다!
구체적인 내용은 아래 공식 문서를 참고해주세요~!
Locust.io
An open source load testing tool. Define user behaviour with Python code, and swarm your system with millions of simultaneous users.
locust.io
Locust 사용법
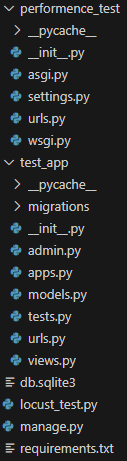
1. Django 프로젝트와 테스트 스크립트 준비하기
# test_app/urls.py
from django.urls import path
from . import views

urlpatterns = [
    # 내장 메서드 sort()
    path('normal_sort/', views.normal_sort),
    # 우선순위큐
    path('priority_queue/', views.priority_queue),
    # 버블정렬
    path('bubble_sort/', views.bubble_sort),
]
# test_app/views.py
from django.http import JsonResponse
from rest_framework.decorators import api_view
import random
array_length = 1000
random_range = 5000
@api_view(['GET'])
def bubble_sort(request):
li = []
for i in range(array_length):
li.append(random.choice(range(1, random_range)))
for i in range(len(li) - 1, 0, -1):
for j in range(i):
if li[j] < li[j + 1]:
li[j], li[j + 1] = li[j + 1], li[j]
context = {
'top': li[0]
}
return JsonResponse(context)
@api_view(['GET'])
def normal_sort(request):
li = []
for i in range(array_length):
li.append(random.choice(range(1, random_range)))
li.sort(reverse=True)
context = {
'top': li[0]
}
return JsonResponse(context)
from queue import PriorityQueue
@api_view(['GET'])
def priority_queue(request):
pq = PriorityQueue()
for i in range(array_length):
pq.put(-random.choice(range(1, random_range)))
context = {
'top': -pq.get()
}
return JsonResponse(context)# locust_test.py
from locust import HttpUser, task, between
class SampleUser(HttpUser):
wait_time = between(1, 3)
# on_start: 가상 유저 생성 시 자동으로 호출되는 메서드
def on_start(self):
print('test start')
@task
def normal_sort(self):
self.client.get("test/normal_sort/")
@task
def priority_queue(self):
self.client.get("test/priority_queue/")
@task
def bubble_sort(self):
self.client.get("test/bubble_sort/")
2. Django 서버 실행
$ python -m venv venv
$ source venv/Script/activate

(venv) $ pip install -r requirements.txt
(venv) $ python manage.py makemigrations
(venv) $ python manage.py migrate
(venv) $ python manage.py runserver
3. vscode 터미널 추가 & Locust 설치 및 실행
(venv) $ pip install locust
(venv) $ locust -f ./locust_test.py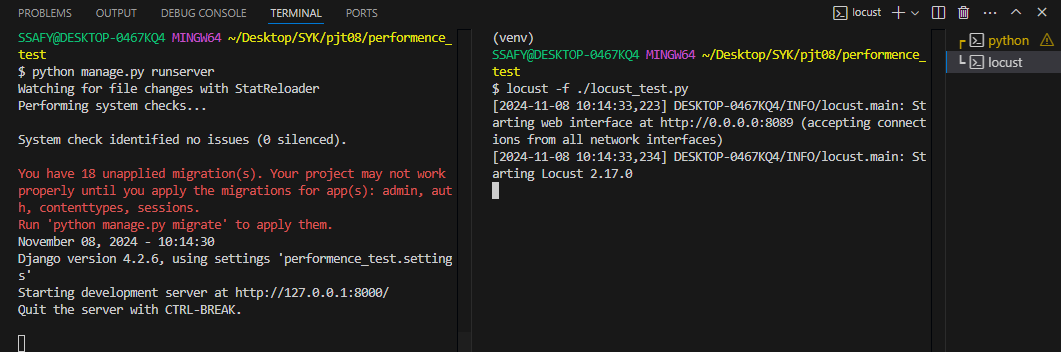
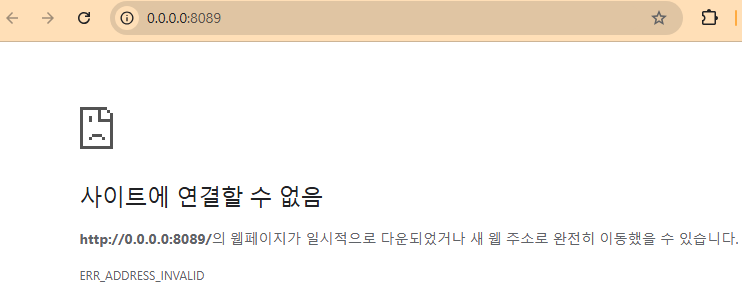
4. Locust 정상 실행 시 콘솔에서 출력되는 http://0.0.0.0:8089가 아닌, http:localhost:8089로 접속
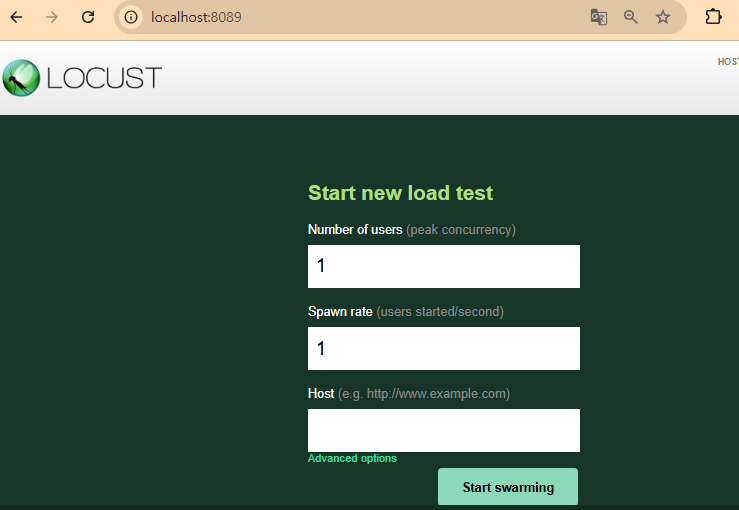
5. 웹 실행 화면
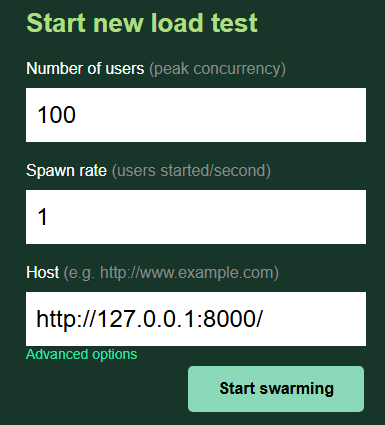
Number of users : 생성할 총 가상유저 수
Spawn rate : 동시에 접속하는 유저 수
Host : 서버 주소 (Django 서버)
Start swarming 버튼 : 클릭 시 가상 유저에 등록된 작업 수행
6. Statistics 탭

- 각 URL에 대한 요청 수, 실패 수, 각 기준에 대한 응답 시간, 평균 응답 크기, RPS 등 다양한 통계 내용을 확인할 수 있습니다.
- 전체 분석은 터미널에서 터미널 종료(Ctrl + C) 입력 또는 Download Data 탭의 Download Report 클릭 시 확인할 수 있습니다.
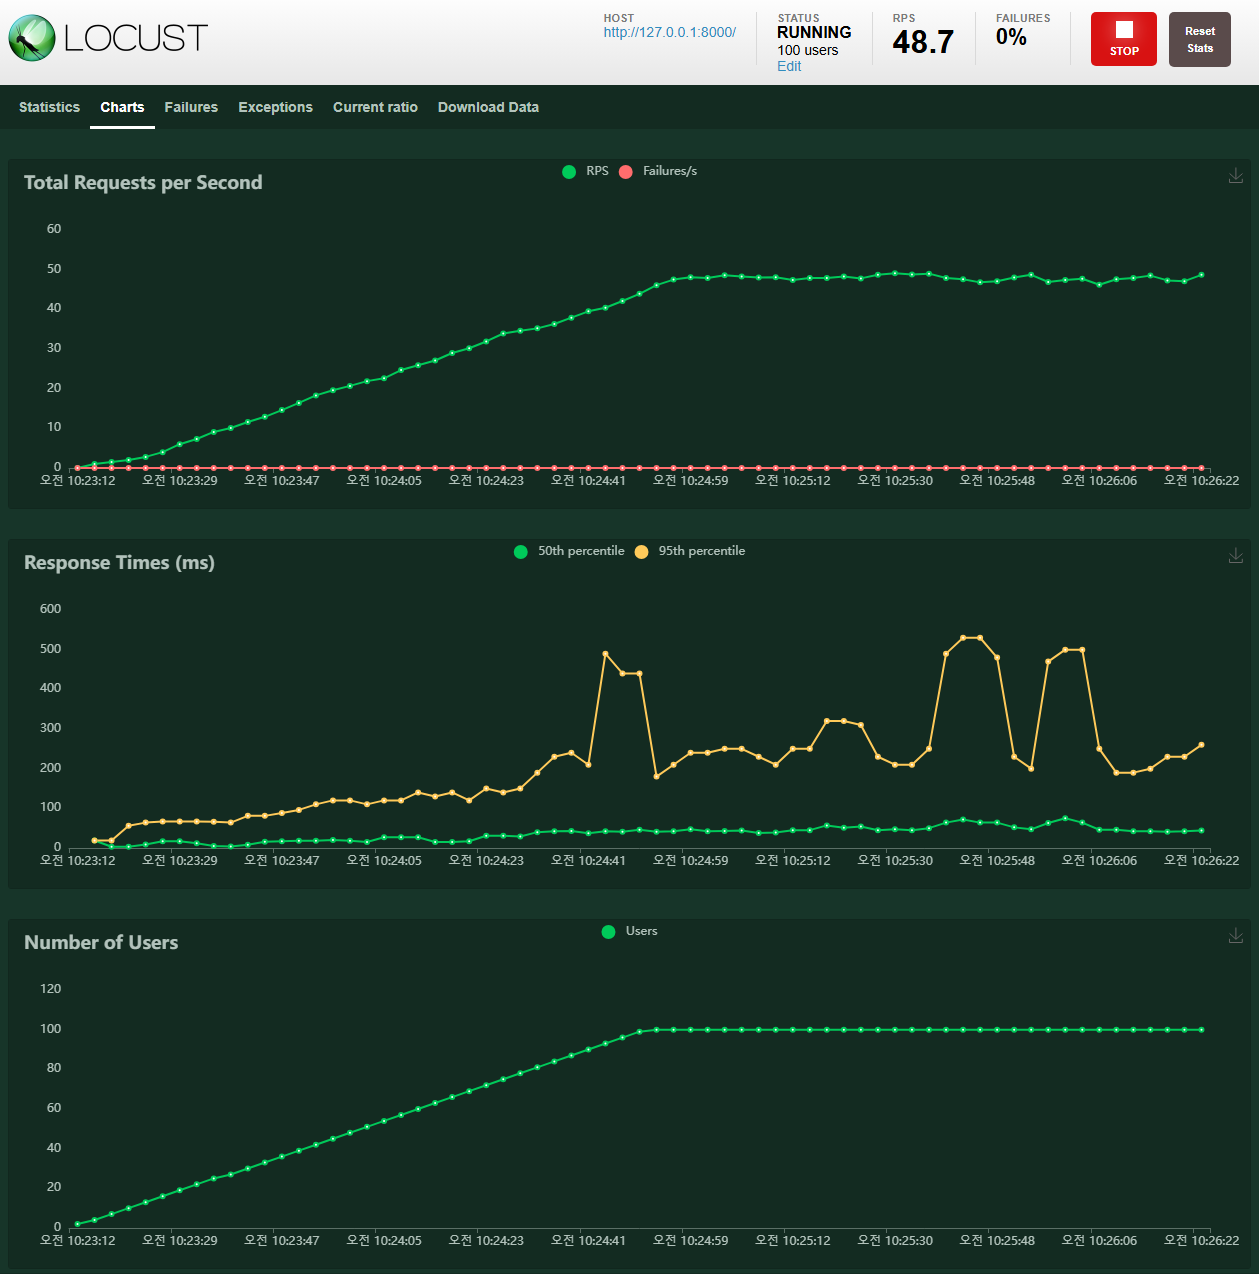
7. Charts 탭
8. Failures 탭
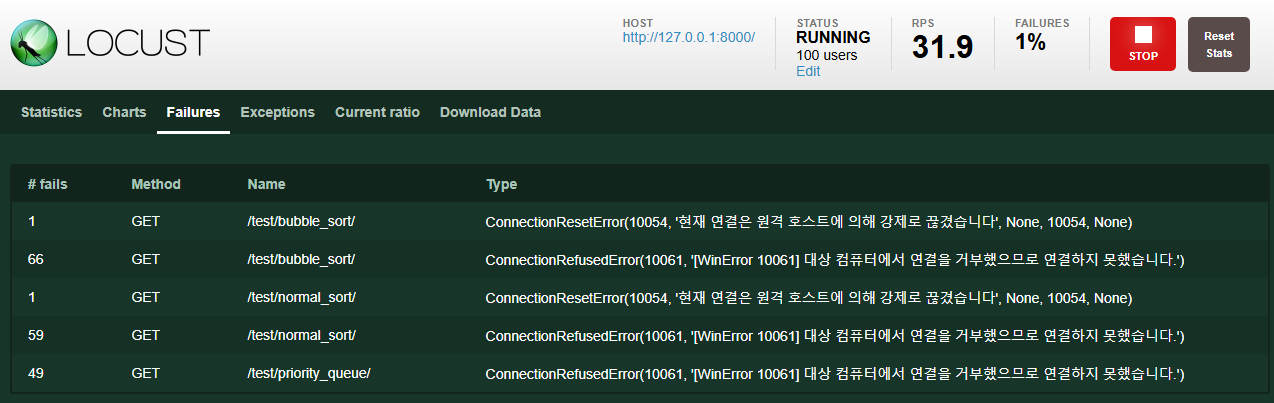
- 실패한 요청에 대한 정보와 실패 원인이 출력됩니다.
- ex) 대상 컴퓨터에서 연결을 거부했으므로 연결하지 못했습니다.
9. Current ratio 탭
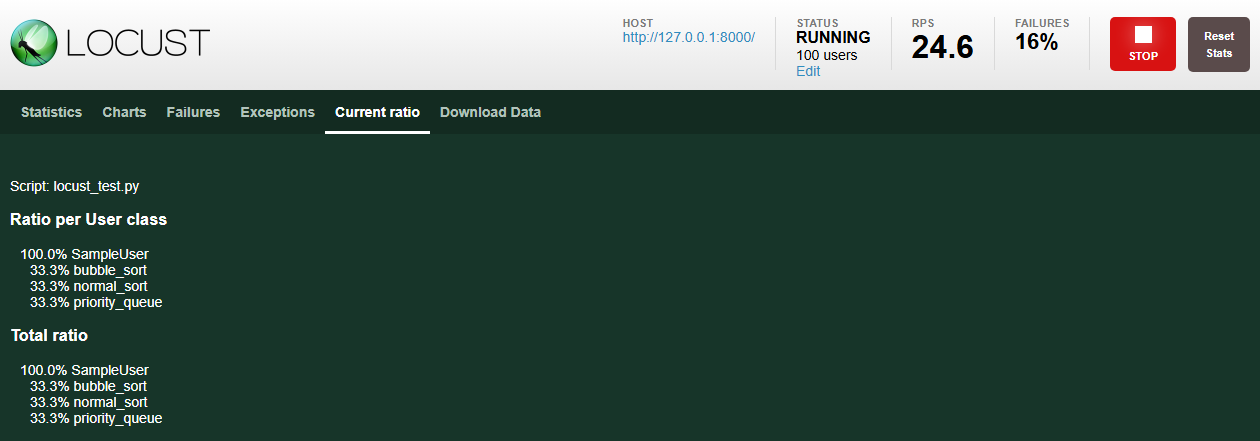
- 현재 작업이 수행된 비율을 출력합니다.
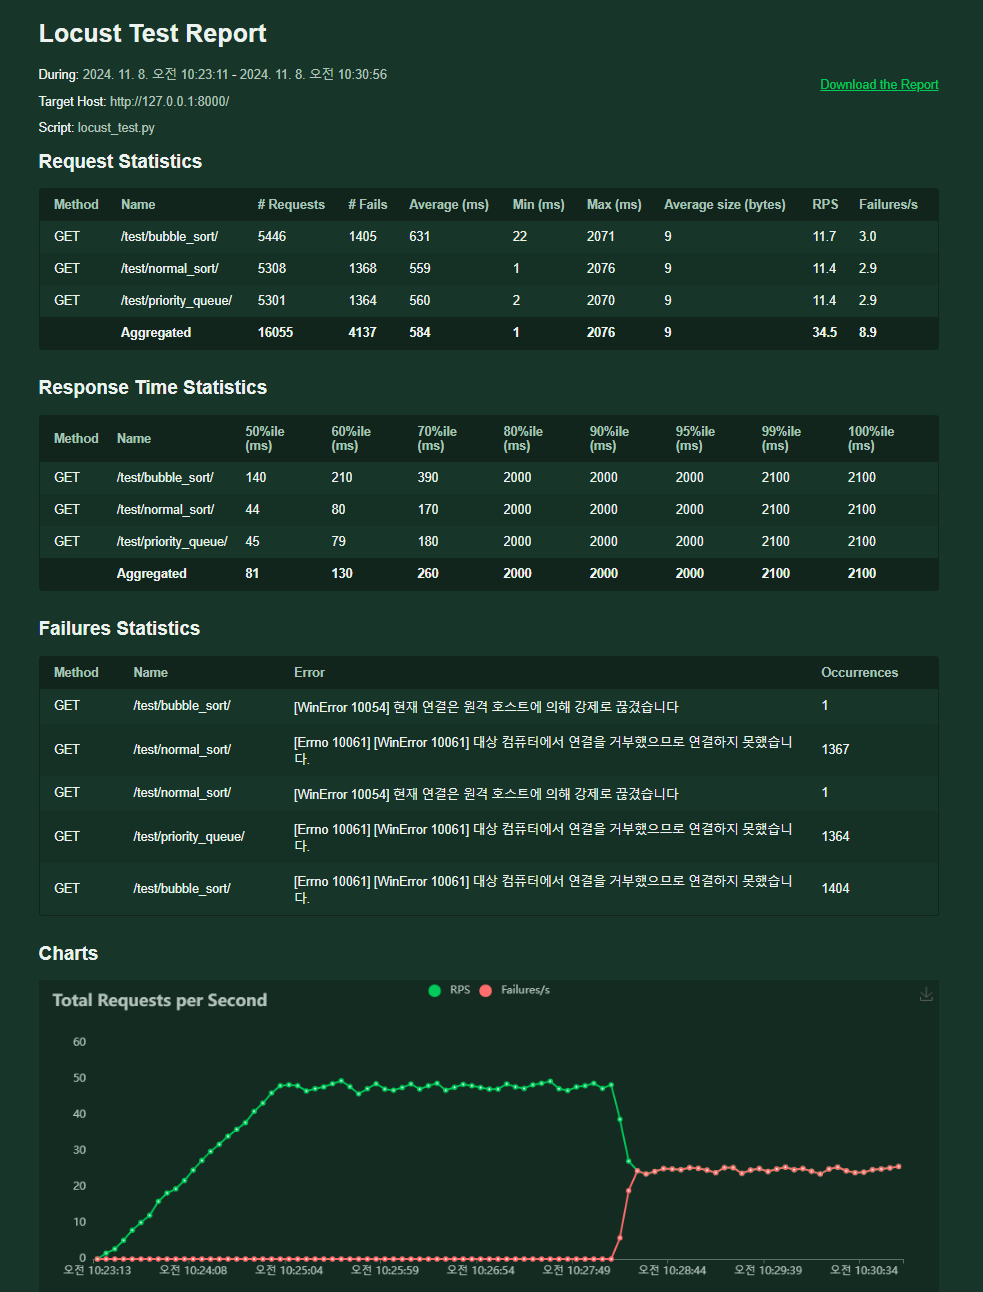
10. 결과 화면 (Download Data -> Download Report)
주의사항
- 위 예제 테스트는 정석적인 방법과는 거리가 있습니다.
- 정석: 서버에 배포된 API 또는 프로그램에 부하 테스트를 해야 합니다.
- 위 예제 테스트는 본인의 PC에서 작동 중인 서버로 요청을 보내는 것입니다.
- 때문에, PC의 성능에 따라 결과가 매우 달라집니다.
- 서버가 작동 중인 본인의 PC에서 테스트 중에 다른 조작을 해서는 안됩니다.
'Study > Django' 카테고리의 다른 글
| [Django] REST API를 이용하여 게시판 기능 구현하기 (with Postman) (4) | 2024.10.23 |
|---|---|
| [Django] Django에서 올바르게 404 not found 에러 응답하기 (1) | 2024.10.17 |
| [Django] Django seed로 테스트 데이터 자동 생성하는 법 (2) | 2024.10.16 |
| [Django] Django로 CRUD를 구현해보자 (2) | 2024.09.28 |


